Corporate photographs with a green screen
The Green screen process
The fastest and cleanest way to composite (layer) photographs in post-production is by photographing the subjects or objects against a green background. This process has been used heavily in photography and video production and in particular news casting. It gives greater control in enhancing the individual elements of the image and allows the photographer to shoot the subject in the studio when convenient and not to have to deal with the variants of weather and light on location.
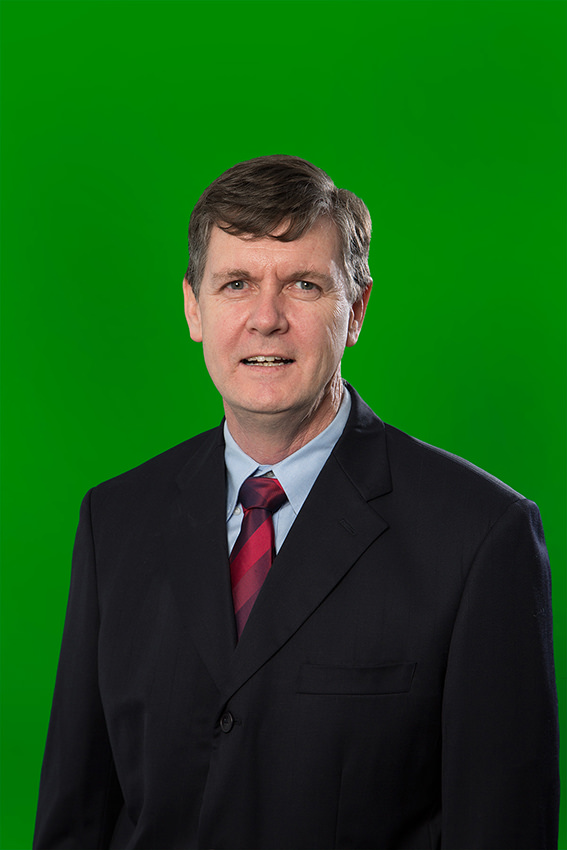
The green background most commonly used is a bright garish colour (sometimes blue) because it is distinctly different from skin tones, clothing and product colours. Once the subjects have been photographed against the green background it is a simple process to remove the green background and leave it transparent. Compositing the images is just a matter of dropping the new background over the open portrait photograph.
Green screen setup
There are a variety of green screen backgrounds on the market that are relatively cheap. If you are looking to do corporate headshots it is acceptable to use a piece of green fabric. I use a matt green synthetic fabric. I set up the background as though it were any studio background, in this case I use two stands that can be raised to over 2 meters. Set them approximately 2.5 meters apart and suspend a 3 meter pole across the top to drape the fabric over. It is important that the fabric is matt to reduce reflections and is smoothed down to avoid creases.
Lighting setup for studio Portraits
Once my green background is rigged I begin to set my lighting. It is very important that the subject is well forward from the screen for two reasons. 1) to eliminate shadows from the subject falling on the background and 2) to stop the green of the background reflecting onto the subject when the flash is triggered. If the green does reflect onto the subject it will be automatically removed when the background is removed in Photoshop. I suggest the subject be about 3 meters forward from the background.
Corporate lighting setup
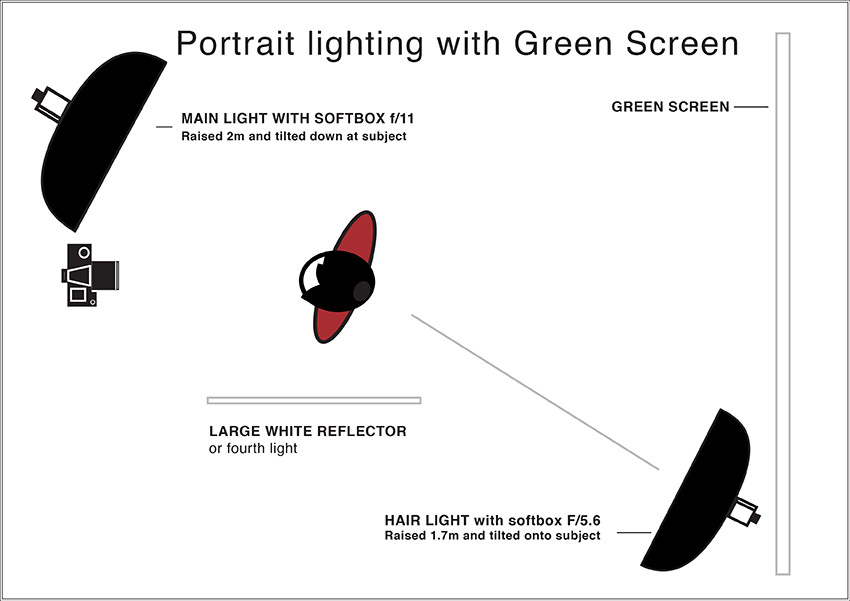
My typical corporate lighting setup is a raised soft-box beside me to my left to illuminate the subjects face, a raised hair-light at 45 degrees behind the subject to the right and a bounce on a stand to the right of the subject to soften the shadow on their face. Be careful there is no light spill from the hair light onto the front of the background. It will illuminate any creases and uneven surfaces. (See diagram below)
Shooting corporate portrait onsite
In a typical scenario I use the boardroom or an unused room at the clients office to setup my lighting studio. This is more convenient for clients to organise their staff to be photographed and gives me the opportunity to also shoot the background on location.
Shooting the backgrounds
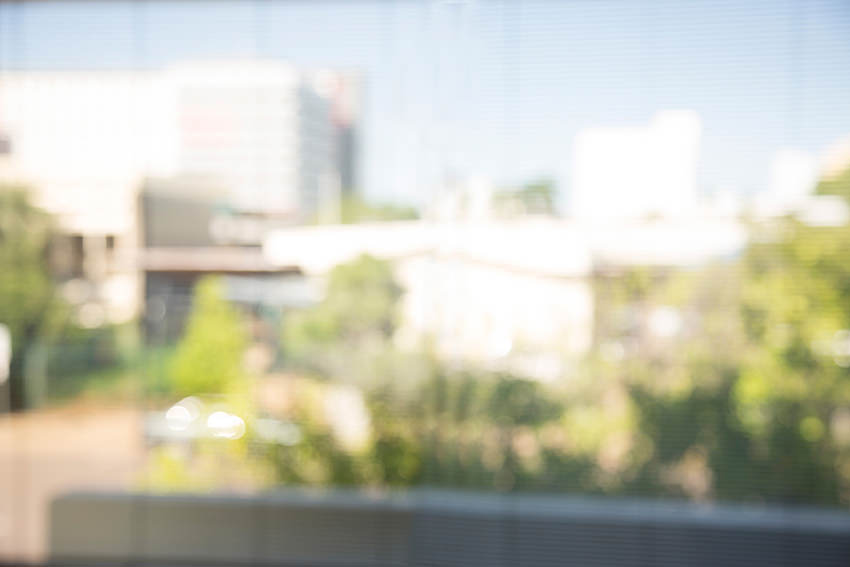
After the portraits are shot I scout the office to find a number of good views from the windows to photograph the backgrounds. The best are the simplest views and tend to be above ground level, second floor for example. An ideal background shot is of distant buildings, blue sky and not too many distracting structures. To simulate a shallow depth of field I turn the auto focus off on my camera and manually blur the image. You don’t want to loose all the detail so I often shoot a variety of focuses and exposures.
Processing the green screen images
Now that the photography work is complete I head back to the studio. After importing the images I open one of the portraits in Photoshop. To begin I make a duplicate layer of the image. Go to ‘Layers’ in the toolbar then to ‘Duplicate layers’. A second layer of the image will appear in the Layers panel. Next is to select the green background and remove it. Go to ‘Select’ in the toolbar then ‘Colour Range’ which activates a popup window. On the right side under the Save button of the popup there are 3 eyedropper tools. Click the dropper with the plus + symbol.
Run the eyedropper cursor over the open photograph. By clicking on the green areas it will select the areas to be removed. If the background colour is even there will be little to select if there are a variety of tones there will be extra to do. On the popup window a high key black and white image of the open portrait gives an excellent reference to what has been selected. I also use this image to select areas to be removed. If areas within the portrait start to be marked for removal, I change to the cursor with the minus symbol and click within the portrait image.
Once all is select I change the fuzziness slider to 3. This will soften the edge. However if there is too much fuzziness the green will bleed onto the subject.
Next go to ‘Select’ in the toolbar then ‘Modify’ and ‘Contract’. I set the Contract Selection to 1 pixels. Now go to ‘Select’ and ‘Refine Edges’. Under Adjust Edges I set the Smooth slider to 10. If I think the portrait edges are too hard I will add a little feathering.
Now I can remove the green background by pressing the delete button on my keyboard. To see the background as transparent the duplicated layer needs to be turned off in the Layers panel. Often there are rough edges, green background in the subjects’ hair or dots of the background not deleted. It is worth zooming in and checking over the image and removing these areas with the Eraser tool.
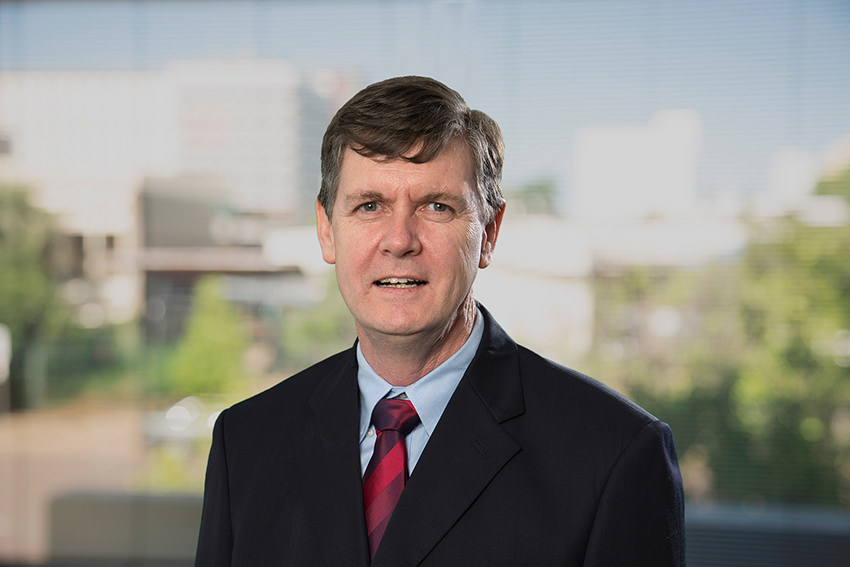
Personally I aim for my corporate portraits to look as natural as possible. Photoshop allows you to work on the different layers before they are merged. Colour saturation, contrast and exposure can be adjusted on each of the images to bring their values to how I like them. This last step allows the photographer to add their personal touch, to either go wild and dramatic with high contrast and colour saturation or a soft and even natural look.